


What if your app could be told something changed instead of asking every few minutes?
A webhook is that idea made practical: an event-driven HTTP callback that pushes a JSON payload to a URL you control the moment something happens.
That means near real-time updates, fewer wasted API calls, and less server work, think doorbell instead of standing at the door.
In this post I’ll explain how webhooks work, when to pick them over polling or WebSockets, and the quick setup and verification steps you need to stop missing data and save time.
Clear Explanation of the Webhook Concept for Beginners

A webhook is an event-driven HTTP callback that lets one application automatically send data to another the moment something specific happens. Think of it as a “reverse API.” Instead of you repeatedly asking a system “Has anything changed?”, the system proactively notifies your application when an event occurs. The webhook sends this notification to a URL you provide (your webhook endpoint), typically as an HTTP POST request containing details about what just happened.
Webhooks exist to solve a simple problem: constant polling is wasteful. Without them, your app would need to send API requests every few minutes just to check if something new occurred. Most of those requests return nothing, burning server resources, hitting API rate limits, and sometimes costing you money. Webhooks flip that model. The source system watches for events and only calls your endpoint when there’s actual news to report, cutting unnecessary traffic and delivering updates in near real time.
Think of a webhook like a doorbell. You don’t stand at your front door every thirty seconds checking if someone is outside (that’s polling). Instead, when someone arrives they press the doorbell, and you get an instant notification inside your house. That’s the webhook. The notification happens immediately, you act on it right away, and you spend zero effort monitoring an empty doorway.
Common events that trigger webhooks:
A new lead is created in your marketing automation platform. An issue or pull request is opened in your code repository. A registrant signs up for an event through your ticketing system. A security alert fires in your monitoring tool and needs to reach your team chat.
How Webhooks Work in an Event-Driven Workflow

When you set up a webhook, you’re giving a source application permission to call a specific URL on your server whenever a particular event happens. That URL is your webhook endpoint, a public HTTP address capable of receiving POST requests. The source application stores this endpoint and monitors for the events you’ve subscribed to. The moment one of those events occurs, the source system assembles a payload (usually JSON, sometimes XML) containing the event type, a timestamp, and the relevant data, then sends it as an HTTP POST to your endpoint.
Your endpoint’s job is straightforward: receive the request, verify it’s legitimate, acknowledge receipt quickly by returning an HTTP 2xx status code (typically 200 OK), and then process the event data. Most webhook providers expect a response within a few seconds. If your endpoint is slow to respond or returns an error status, the provider will usually retry delivery multiple times using exponential backoff. The payload itself is delivered in the request body and often includes custom headers for authentication or signature verification.
Here’s the complete lifecycle in six steps:
- Registration. You provide your webhook endpoint URL and subscribe to specific event types through the source application’s settings or API.
- Event occurs. Something happens in the source system that matches your subscription (a payment completes, an issue is updated, a new record is created).
- Payload delivery. The source system immediately sends an HTTP POST to your endpoint containing a JSON or XML payload with event details.
- Authentication check. Your endpoint verifies the request using a signature, secret, or other method to confirm it really came from the source.
- Acknowledgment. Your endpoint returns HTTP 200 or 204 to confirm successful receipt, ideally within a few seconds.
- Processing. Your application processes the event data asynchronously (update a database, trigger a workflow, send a notification).
A simple diagram of the flow looks like this:
Event → Source App → HTTP POST to https://yourdomain.com/webhooks/endpoint → Your Server returns 200 OK → Your Server queues and processes the event data.
Webhooks Compared with APIs, Polling, and WebSockets

Each integration pattern solves different problems. Picking the wrong one wastes time and resources. APIs are requester-driven and two-way. You ask for data or send a command, and the API responds. That’s great for on-demand CRUD operations or fetching specific records. Webhooks are one-way and event-driven. The source pushes data to you only when something happens, so you’re not wasting cycles checking for updates. WebSockets are persistent, bidirectional connections designed for low latency, real time communication like chat apps or live dashboards.
Polling is the brute force alternative to webhooks. You set a timer (commonly every 10 or 15 minutes) and send an API request asking “Anything new?” Most of the time the answer is no, but you’ve burned an API call, server CPU, and network bandwidth anyway. Do that across dozens of integrations and you’ll hit rate limits, rack up cloud costs, and still have stale data between polling intervals. In a Zapier survey, 82% of developers said they prefer webhooks over polling for exactly these reasons.
| Method | Communication Type | Best Use Case | Drawbacks |
|---|---|---|---|
| REST API | Two-way, requester-driven | On-demand data fetches, CRUD operations | Client must initiate; no push notifications |
| Webhook | One-way push, event-driven | Real time event notifications, automation triggers | Requires public endpoint; ordering not guaranteed |
| WebSocket | Persistent bidirectional connection | Live chat, dashboards, gaming, collaborative editing | Complex setup; higher server overhead per connection |
Real World Webhook Use Cases and Examples

Webhooks power integrations across every category of business software. Marketing teams use them to sync leads in real time. When a prospect fills out a form in Marketo, a webhook fires immediately to create or update that lead record in Salesforce, so sales reps see fresh data without waiting for a nightly batch sync. Event platforms like Eventbrite rely on webhooks to notify CRM systems the moment someone registers, checking if the email already exists and adding a new lead only if needed.
Support and development teams depend on webhooks to keep tickets and issues synchronized. Jira can send a webhook to Salesforce whenever an issue is created or updated, automatically creating the corresponding account and case so customer success teams have visibility without switching tools. Security and IT operations use webhooks to route alerts. Splunk can push critical system alerts directly into a Slack channel via webhook, ensuring the on-call engineer sees the notification in seconds rather than waiting for an email digest or manual check.
Here are six specific integrations that rely heavily on webhooks:
Stripe payment events. Webhooks notify your app when a payment succeeds, an invoice is paid, a subscription is canceled, or a charge is disputed (dozens of event types cover the full payment lifecycle).
GitHub repository activity. Over 40 event types including push, pull_request, issues, release, and deployment let CI/CD pipelines and project management tools react instantly to code changes.
Shopify order and inventory updates. Webhooks for orders/create, products/update, customers/create, and inventory_levels/update keep e-commerce back office systems synchronized. Shopify also mandates compliance webhooks for GDPR data requests and redaction.
Slack incoming webhooks. Post messages to channels programmatically (great for alerts and bot notifications). Slack’s Events API uses webhooks in the reverse direction to notify your app about channel activity.
QuickBooks accounting changes. Webhooks deliver entity IDs and operation types (create, update, delete) but require a follow-up API call to fetch the full record, reducing payload size and protecting sensitive financial data.
Zapier automation backbone. Most Zapier integrations use webhooks behind the scenes to trigger multi-step workflows without polling, keeping data flowing between apps in near real time.
Benefits and Impact of Using Webhooks in Modern Systems

The biggest win is near real time data synchronization. Webhooks deliver events within seconds of occurrence, letting employees act on time-sensitive information inside the tools they already use. No context switching, no stale dashboards, no waiting for the next polling cycle. That speed advantage compounds when you’re running dozens, if not hundreds, of automated processes (a common scale in larger organizations). In one analysis of automations built by 900 organizations, webhook-driven workflows consistently outperformed polling based integrations on both latency and resource efficiency.
Cost savings show up in two places: API request volume and compute resources. Polling every 10 minutes means 144 API calls per day per integration, and most return empty results. Webhooks eliminate those wasted calls, keeping you well under rate limits and avoiding overage fees. On the infrastructure side, you’re not running cron jobs or background workers that wake up constantly to check for changes. Your webhook endpoint sits idle until an event arrives, using CPU and RAM only when there’s actual work to do.
Key advantages at a glance:
Real time triggers. Launch workflows the moment an event occurs, not 10 or 15 minutes later when the next poll runs.
Lower operational costs. Avoid unnecessary API requests, reduce server load, and stay within free tier limits on cloud platforms.
Simpler maintenance. Once configured, webhooks run autonomously (“set it and forget it”) with minimal ongoing tuning compared to polling schedules and retry logic.
Basic Webhook Implementation Steps for Beginners
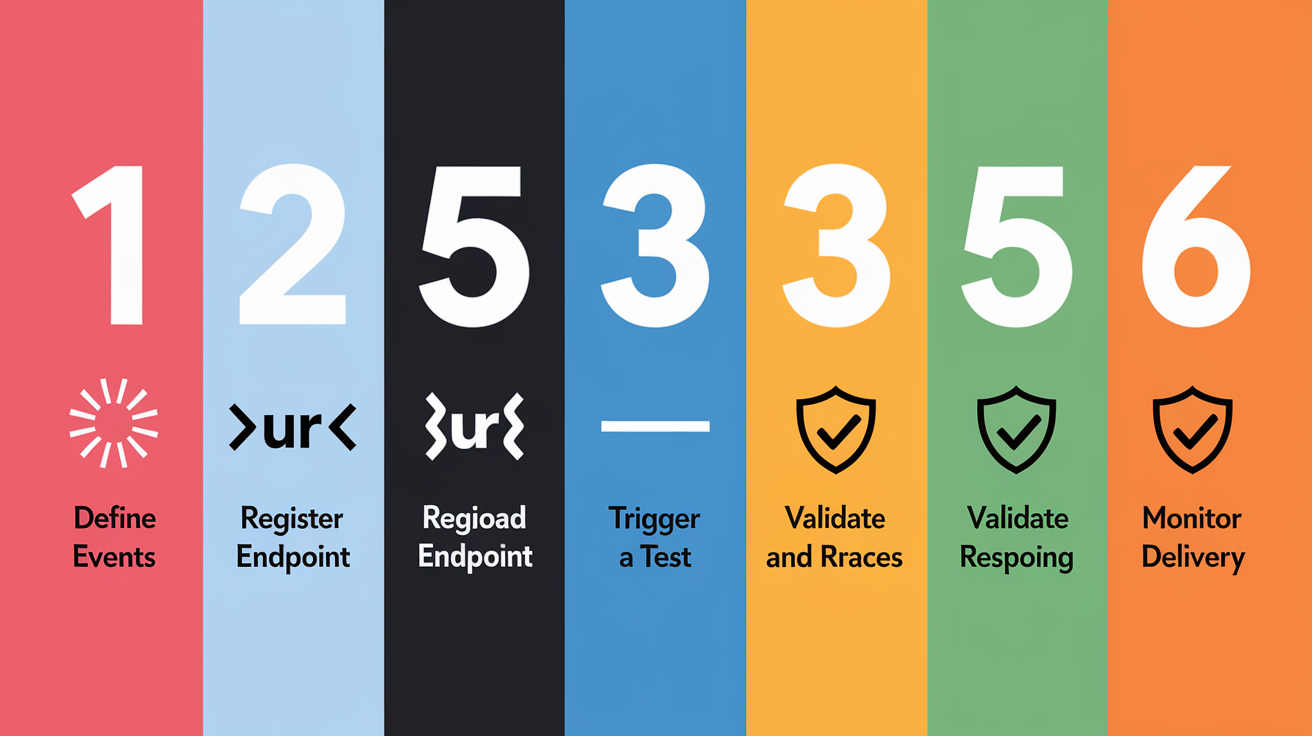
Setting up your first webhook is easier than it sounds. Start by reading the API documentation of the service you want to receive events from. Look for sections titled “Webhooks,” “Event Subscriptions,” or “Notifications.” Most providers walk you through endpoint requirements, payload schemas, and authentication methods. The implementation itself boils down to deploying a simple HTTPS endpoint that accepts POST requests and responds quickly.
- Define your event types. Decide which events you care about (new orders, updated issues, payment confirmations) and subscribe only to those to reduce noise.
- Register your endpoint URL. Provide a public HTTPS URL like https://yourdomain.com/webhooks/stripe in the source app’s webhook settings or via its API.
- Choose your payload format. Most providers default to JSON. A few older systems use XML or form-encoded data. Check the docs for sample payloads.
- Trigger or wait for a test event. Use the provider’s test/send feature or perform a real action (create a test record) to generate your first webhook delivery.
- Validate and respond. Your endpoint checks the signature or secret, logs the event, queues any heavy processing, and immediately returns HTTP 200 or 204.
- Monitor delivery and retries. Watch logs for failures, duplicate events, or signature mismatches. Confirm retries are working as expected and tune your idempotency logic.
For local development, use ngrok or localtunnel to expose your localhost endpoint to the internet temporarily. Tools like webhook.site and RequestBin let you inspect incoming payloads without writing any code. Paste the provided URL into the source app’s webhook config, trigger an event, and review the request headers and body in your browser. Once you’re confident the payload structure is correct, swap in your real endpoint and implement signature verification and processing logic.
Webhook Security and Authentication Essentials

Never trust an inbound webhook request just because it arrived at your endpoint. Anyone on the internet can POST to a public URL, so you need a reliable way to verify the request actually came from the service you expect. The most common method is HMAC signature verification. The provider signs the payload with a shared secret and includes the signature in a custom header. Your endpoint recomputes the signature using the same secret and algorithm, then compares the two. If they match, the request is authentic.
Different providers use different header names and algorithms. Stripe sends Stripe-Signature and uses HMAC-SHA256. GitHub uses X-Hub-Signature-256 (also HMAC-SHA256). Shopify uses X-Shopify-Hmac-SHA256. Some older systems rely on SHA-1 signatures, which produce a 40-character hex string but are considered less secure. Always use timing-safe comparison functions when checking signatures to prevent timing attacks. Additionally, validate the timestamp included in the signature header. Reject requests older than five minutes to block replay attacks.
Signature Verification Steps
- Extract the signature and timestamp from the custom header (e.g., Stripe-Signature contains both, separated by commas).
- Reconstruct the signed payload by concatenating the timestamp, a period, and the raw request body exactly as received (do not parse or reformat the JSON).
- Compute the HMAC using your shared secret and the same hash algorithm the provider specifies (HMAC-SHA256 is the current standard).
- Compare signatures using a constant time comparison function to avoid leaking timing information. If they match, accept and process the event.
Beyond signatures, always require HTTPS/TLS to encrypt data in transit. For high security environments, consider mutual TLS (mTLS), which validates both the client and server certificates during the handshake. IP allowlisting is an optional defense in depth measure. Some providers publish the IP ranges their webhooks originate from, but it should never be your only authentication method. Store secrets in environment variables or a secrets manager, rotate them periodically, and never commit them to version control.
Reliability, Retries, and Idempotency in Webhook Delivery

Webhooks are designed to be reliable, but the internet is not. Networks fail, services restart, and endpoints go down for deploys. That’s why every major provider implements automatic retries with exponential backoff. If your endpoint doesn’t return a 2xx status or doesn’t respond in time, the provider will try again. Retry policies vary by platform. Stripe and GitHub both retry failed deliveries for up to three days. Shopify retries 19 times over a 48 hour window. Each retry waits progressively longer (exponential backoff) to avoid overwhelming a struggling endpoint.
Because retries are guaranteed, your endpoint must handle duplicate deliveries gracefully. The standard approach is idempotency: store a unique event ID when you first process a webhook, and skip processing if you see that ID again. Stripe includes an id field in every event payload. GitHub sends a unique delivery GUID in the X-GitHub-Delivery header. Check and store these identifiers in a database or cache before doing any side effects (updating records, sending emails, charging cards). That way, even if the same event arrives five times due to retries, your system processes it exactly once.
| Provider | Retry Window | Retry Count / Strategy |
|---|---|---|
| Stripe | Up to 3 days | Exponential backoff; stops after 3 days of failures |
| GitHub | Up to 3 days | Exponential backoff; manual redeliver available in UI |
| Shopify | 48 hours | 19 retry attempts with increasing intervals |
Webhooks can also arrive out of order, especially under heavy load or during retries. If strict ordering matters (for example, processing a sequence of status changes), include timestamps or sequence numbers in your logic and design handlers to be order-independent when possible. For events that fail permanently after all retries, route them to a dead letter queue so you can investigate and replay them manually without losing data.
Testing and Troubleshooting Webhooks Effectively

Testing webhooks during development can feel tricky because you need a public endpoint to receive events, but your code is running on localhost. The easiest solution is a secure tunnel tool like ngrok or localtunnel. Run ngrok http 3000 in your terminal, and it gives you a public HTTPS URL that forwards requests to your local server. Paste that URL into the webhook settings of your source app, trigger a test event, and watch the request arrive in your local logs. It’s fast, and you can iterate on your handler code without deploying anything.
Most webhook providers also offer built-in test features. The Stripe CLI can forward live or test events directly to your local endpoint with a single command. GitHub lets you redeliver any previous webhook from the UI, which is incredibly useful when debugging signature verification or payload parsing. Shopify’s Partner Dashboard includes a “Send test webhook” button that fires a sample payload instantly. For pure inspection without writing code, use webhook.site or RequestBin. They give you a temporary URL and display every incoming request in a web UI, showing headers, body, and timing.
Core troubleshooting steps when webhooks aren’t working:
Check your endpoint returns a 2xx status quickly. Slow responses or 4xx/5xx errors trigger retries and eventual failure.
Verify signature or secret matching. Log the raw payload and recomputed signature side by side to catch encoding or algorithm mismatches.
Inspect retry attempts in the provider’s dashboard. Most platforms show delivery history, response codes, and error messages.
Test with curl or Postman. Manually POST a sample payload to your endpoint to confirm routing, TLS, and basic handler logic.
Enable structured logging. Capture event IDs, timestamps, signature headers, and processing outcomes so you can trace failures and duplicate deliveries.
Monitoring is just as important as testing. Set up alerts when your endpoint’s error rate spikes or when events pile up in a dead letter queue. Track delivery latency (time from event occurrence to successful processing) to catch performance regressions. Good logging and observability turn webhook debugging from guesswork into a quick log search.
Final Words
In the action, you saw a plain definition of webhooks as event-driven HTTP callbacks (a reverse API), how they work, and real examples across Stripe, GitHub, Shopify, and more.
You also got setup steps, security checks (HMAC, HTTPS, timestamps), retry and idempotency advice, and testing tools like ngrok and webhook.site.
If you still ask what is a webhook, this post answers it and gives practical steps to implement, secure, and debug them. Try a small test endpoint and you’ll see near real-time events in minutes, a quick way to validate the flow and move forward confidently.
FAQ
Q: What are webhooks used for?
A: Webhooks are used for sending real-time, one-way event notifications from one system to another so you can trigger processing, sync data, or notify services without polling.
Q: What’s a webhook vs API?
A: A webhook is a one-way, event-driven HTTP callback that pushes updates; an API is a two-way, request-driven interface you call to ask for or change data, so webhooks push, APIs pull or act on demand.
Q: What is a webhook for dummies?
A: A webhook for dummies is like a doorbell: when something happens, it sends an HTTP POST to your URL so your app knows to act immediately, without constantly checking.
Q: How do I create a webhook?
A: To create a webhook, register a public POST endpoint URL with the provider, accept JSON payloads, return a 2xx on success, verify signatures (HMAC), and test locally with ngrok or webhook.site.