


Tired of waiting for Stripe to retry failed webhooks or guessing if your handler actually works?
You can test Stripe webhooks locally so you catch signature bugs, 500s, and broken JSON before they hit production.
This tutorial walks through three practical options: Stripe CLI for quick mocks, ngrok-style tunnels for real test-mode requests, and capture-and-replay tools for inspecting raw headers and replaying exact payloads.
Follow the core workflow and pick the right tool for your use case so you stop debugging in production.
Core Workflow for Testing Stripe Webhooks Locally

Testing Stripe webhooks locally needs three things: a webhook endpoint running on your machine, a way for Stripe to reach that localhost address, and a method to trigger events. Without all three, you’re stuck waiting for real production events or guessing whether your handler actually works.
You’ve got three options. The Stripe CLI can forward events and trigger mock data. Ngrok (or similar tunnels) expose your local server to the internet so real test mode events from the Stripe Dashboard can reach you. And capture systems store raw webhook requests so you can inspect headers, replay exact payloads, and debug signature failures without waiting for Stripe’s backoff retries.
Here’s the flow:
- Start your local server. Run your application with a webhook route listening, maybe on
http://localhost:3000/api/webhooks/stripeorhttp://localhost:1337/stripe-webhooks-endpoint. - Expose localhost to Stripe. Use
stripe listen --forward-to localhost:3000/api/webhooks/stripe, or runngrok http 3000, or create a persistent capture endpoint that forwards to your local machine. - Configure the endpoint in Stripe Dashboard. Navigate to Developers > Webhooks > +Add endpoint, paste the public URL (CLI ephemeral URL, ngrok public URL, or capture service URL), and select the events you want.
- Trigger events. Run
stripe trigger payment_intent.succeededfor mock data, create a real payment link or checkout session in the Dashboard, or use a test card like4242 4242 4242 4242to generate real test mode events. - Inspect payloads. Check your local terminal for printed JSON, view logs in the Stripe Dashboard event log, or review full raw headers and body in a capture service console.
- Retry or replay failures. Use the Stripe Dashboard’s retry button, the CLI’s ability to retrigger, or a capture system’s replay API to send the exact same request again.
Choose the CLI when you need quick reachability checks and don’t mind mock data. Choose ngrok or a tunnel when you want real test mode event structures. Choose capture systems when you need to reproduce signature errors, inspect raw headers, or iterate on a 500 response without waiting for Stripe’s retry backoff.
Stripe Webhook Endpoint Setup and Local Development Workflow

Your webhook endpoint is the route in your application that receives POST requests from Stripe. It parses the raw body, verifies the signature, and returns an HTTP 200 quickly. Common paths include /stripe-webhooks-endpoint or /api/webhooks/stripe, but you can use any route as long as it’s registered correctly in Stripe and exposed to the internet (or forwarded via CLI or tunnel).
Setting up the endpoint in Stripe Dashboard takes five steps:
Open the Stripe Dashboard and navigate to Developers > Webhooks. Click +Add endpoint. Paste your public webhook URL (the CLI ephemeral URL, ngrok public URL, or capture service URL) into the Endpoint URL field. Add a Description (like “Local dev” or “Staging”) and select the events you want to listen to, such as payment_link.create, payment_link.updated, payment_intent.succeeded, or charge.refunded. Click Add endpoint and confirm it shows up as active in the list.
Once the endpoint is active, every selected event triggers a POST to your URL. You can verify delivery by watching the Dashboard’s event log under Developers > Events, where successful deliveries show HTTP 200 and failures show error codes. If you see retries or timeouts, your endpoint either took too long to respond or returned a non 2xx status.
Using Stripe CLI to Test Webhook Events

The Stripe CLI is the fastest way to forward webhook events to localhost without exposing your machine to the internet. After installing the CLI, run stripe login to authenticate with your Stripe account. Then start forwarding with stripe listen --forward-to localhost:3000/api/webhooks/stripe, replacing the port and path with your actual local endpoint. The CLI prints a webhook signing secret starting with whsec_. Copy this into your .env file or config because your handler needs it to verify signatures.
To trigger a mock event, open a second terminal and run stripe trigger payment_intent.succeeded. The CLI generates fake data and sends it to your forwarded endpoint. You’ll see a log line in the stripe listen terminal showing the event type and delivery status. Your local server should print the payload and return 200. Mock events are fast and don’t require a real checkout, but they use placeholder customer IDs, generic amounts, and may not include all the nested or expanded objects your production handler expects.
| Command | Purpose | Example Output Behavior |
|---|---|---|
stripe login |
Authenticate CLI with your Stripe account | Opens browser, confirms login, prints success message |
stripe listen --forward-to localhost:3000/api/webhooks/stripe |
Forward webhook events to local endpoint | Prints webhook signing secret and logs each forwarded event |
stripe trigger payment_intent.succeeded |
Send a mock event to your endpoint | CLI shows event sent, local terminal prints payload |
stripe trigger checkout.session.completed |
Trigger a mock checkout completion | Generates fake session ID and line items |
The CLI has two important limits. First, every time you restart stripe listen, a new signing secret gets generated. If your handler still uses the old secret, signature verification fails until you update your .env. Second, mock events don’t fully reflect real Stripe data. A real payment_intent.succeeded might include expanded customer objects, metadata, and specific amounts that your business logic depends on. Use stripe trigger to confirm your endpoint is reachable, but validate your integration with real test mode transactions before calling it production ready.
Testing Webhooks Using Local Tunnels (ngrok and Similar)

Local tunnels solve the reachability problem by giving your localhost a public HTTPS URL that Stripe can POST to. The most popular tool is ngrok. Run ngrok http 3000 to expose port 3000, and ngrok prints a public URL like https://abc123.ngrok.io. Paste that URL plus your webhook path (for example, https://abc123.ngrok.io/api/webhooks/stripe) into the Stripe Dashboard as your endpoint URL. Now when you create a real payment link or checkout session in test mode, Stripe sends the webhook to ngrok, which forwards it to your local server.
Tunnels have tradeoffs compared to the Stripe CLI and capture systems:
ngrok (free tier) generates a new random URL every time you restart, so you have to update the webhook URL in Stripe Dashboard after every restart. The ngrok web inspector at http://127.0.0.1:4040 shows request and response details, but history disappears when you close ngrok.
localtunnel is similar to ngrok but can request a custom subdomain with lt --port 3000 --subdomain myapp, making the URL more stable across restarts (subject to availability). Less reliable than ngrok in practice.
Cloudflare Tunnel gives you a persistent URL after initial setup but requires installing cloudflared and configuring a tunnel, which is overkill for quick local tests. Works well for long running staging environments though.
Tailscale Funnel exposes a local port on your tailnet’s public domain. Stable URL but requires Tailscale setup and may not be accessible from all networks.
Tunnels work best when you need real test mode event structures and don’t want to manually craft JSON. The downside is that every restart requires reconfiguring Stripe, and you lose request history when the tunnel closes. If a webhook fails, you have to wait for Stripe’s retry schedule or manually retrigger the event in the Dashboard instead of instantly replaying the exact request.
Capture and Replay Strategy for Reliable Webhook Testing
Capture systems give you a persistent public webhook URL that stores every incoming request. You paste this URL into Stripe Dashboard, trigger real test mode events, and then inspect or replay the raw requests to your local endpoint as many times as you need. You can turn off your laptop, go grab coffee, come back, and replay yesterday’s failed webhook without waiting for Stripe to retry.
| Benefit | Explanation |
|---|---|
| Exact raw payloads | You see the real Stripe-Signature header, timestamp, and body exactly as Stripe sent it, making signature verification bugs obvious. |
| Replayable requests | Click a replay button or call a replay API to send the same request to http://localhost:3000/api/webhooks/stripe instantly, no waiting for Stripe backoff. |
| History and search | All captured requests stay in the console with filters by event type, status code, and timestamp, so you can compare working vs failing requests. |
Here’s a typical workflow. First, create a capture endpoint via API or web console. The service returns a unique webhook URL like https://capture-service.example/hook/ep_V1StGXR8_Z5j. Paste that URL into Stripe Dashboard under Developers > Webhooks > +Add endpoint and select your events. Next, trigger a real test mode transaction. Create a payment link or use test card 4242 4242 4242 4242 in a checkout session. The capture service logs the full request including headers and body. Open the capture console, find the request, and inspect the Stripe-Signature header and the raw JSON body. If your local handler returns a 500, click the replay button to forward the identical request to http://localhost:3000/api/webhooks/stripe while you iterate on your code.
Capture systems beat the CLI and ngrok when you’re debugging signature mismatches, unexpected event structures, or intermittent 500s. The CLI rotates signing secrets on restart, and ngrok loses history when you close it. A capture system keeps the original signature and timestamp, so you can compare what Stripe sent versus what your middleware passes to your handler. Some services offer free tiers with limits like 100 calls per day and 3 endpoints, which is enough for most local development and staging environments.
Stripe Webhook Signature Verification and Security

Every Stripe webhook includes a Stripe-Signature header with a timestamp (t=) and one or more signatures (v1=). The signature is an HMAC SHA256 hash of the concatenated timestamp and raw request body, computed using your webhook signing secret. Verifying this signature proves the request came from Stripe and hasn’t been tampered with. If verification fails, reject the request with HTTP 400 and log the error. Never process an unverified webhook.
HMAC verification follows five steps borrowed from RFC 2104. First, retrieve the signing secret from your environment (the whsec_ key from Stripe Dashboard or CLI). Second, extract the timestamp and signature from the Stripe-Signature header by splitting on commas and equals signs. Third, concatenate the timestamp, a period, and the raw request body into a single string. Fourth, compute the HMAC SHA256 of that string using the signing secret as the key. Fifth, compare your computed signature to the signature Stripe sent. If they match and the timestamp is within five minutes of now, the request is authentic.
Here’s how to extract and verify the raw body in common stacks:
Node.js / Express. Use express.raw({ type: 'application/json' }) middleware instead of express.json() so req.body is a Buffer. Pass req.body and req.headers['stripe-signature'] to Stripe’s stripe.webhooks.constructEvent(req.body, sig, secret).
Python / Flask. Read request.data (the raw bytes) instead of request.json. Call stripe.Webhook.construct_event(request.data, sig_header, secret).
Ruby / Rails. Use request.raw_post instead of request.body.read to get the original bytes. Call Stripe::Webhook.construct_event(payload, sig_header, secret).
Go / net/http. Read the body with ioutil.ReadAll(r.Body) and verify manually or use Stripe’s Go SDK webhook.ConstructEvent(payload, sigHeader, secret).
PHP / Laravel. Use $request->getContent() to get the raw body and $request->header('Stripe-Signature') for the header, then verify with Stripe’s PHP SDK \Stripe\Webhook::constructEvent($payload, $sigHeader, $secret).
Store your signing secret in an environment variable like STRIPE_WEBHOOK_SECRET and never commit it to source control. When using the CLI, remember that stripe listen prints a new secret every time you restart. Copy it into your .env and restart your local server so the handler picks up the new value. Middleware that parses or pretty prints JSON will break verification because the signature is computed over the exact raw bytes Stripe sent.
Handling and Testing Stripe Webhook Event Types

Stripe webhooks carry an event.type field that tells you what happened. payment_intent.succeeded, charge.refunded, checkout.session.completed, invoice.payment_failed, and dozens more. Your handler should switch on event.type and route each event to the appropriate business logic. For example, payment_intent.succeeded might provision a subscription, charge.refunded might reverse an order, and checkout.session.completed might send a confirmation email.
Event objects sometimes include expanded nested objects and sometimes only IDs. A payment_intent.succeeded event might have event.data.object.customer as a full customer object in one scenario and as a string ID like cus_ABC123 in another, depending on whether the API request that triggered the event used expand parameters. Your handler must check the type and fetch the full object via the Stripe API if you need more fields.
To test each event type, use one of these methods:
CLI mock trigger. Run stripe trigger payment_intent.succeeded or stripe trigger checkout.session.completed. Fast but uses fake data. Good for reachability checks.
Real test mode transaction. Create a payment link in the Dashboard (triggers payment_link.create), complete a checkout with test card 4242 4242 4242 4242 (triggers payment_intent.succeeded or charge.succeeded), or issue a refund (triggers charge.refunded). Exercises real event structures.
Manual event send from Dashboard. Under Developers > Events, click an old event and use “Send test webhook” to replay it to your endpoint. Useful for reproducing rare events like invoice.payment_failed.
Real test mode transactions are the only way to validate that your handler correctly parses expanded objects, handles metadata your checkout flow attaches, and processes amounts and currency codes your production flow will see. Mock triggers should only confirm that your endpoint is reachable and returns 200.
Debugging Stripe Webhook Failures and Retries

Stripe delivers webhooks with at least once semantics and expects an HTTP 200 response within roughly five to ten seconds. If your endpoint returns a 4xx, 5xx, or times out, Stripe retries with exponential backoff. If you have multiple webhook endpoints configured in the Dashboard, each endpoint is retried independently until it succeeds. A flaky staging endpoint can cause noisy retries and alert spam even when your production endpoint is fine.
Long delays sometimes surprise developers. Invoice related webhooks may wait up to one hour after the last webhook is successfully delivered or times out before sending the next invoice event. If your test creates a subscription, sets a failing test card 4000000000000341, and ends the trial in one second, you might wait up to an hour for invoice.payment_failed unless you structure your test to skip authenticity checks and inject a fake webhook with a unique event ID.
| Issue | Likely Cause | Fix |
|---|---|---|
| Signature verification fails | Middleware modified the body, or signing secret is outdated after CLI restart | Use raw body middleware and update .env with new whsec_ secret |
| Webhooks arrive an hour late | Invoice events wait for prior webhook success or timeout | Use test mode fake webhooks with unique event IDs in automated tests |
| Staging logs unknown account errors | Multiple environments share the same Stripe test mode, local tests trigger staging webhooks | Create a second Stripe account for local dev and reserve main account test mode for staging |
When a webhook fails, replaying the identical request is faster than waiting for Stripe’s retry schedule. If you use a capture system, click the retry button in the console to forward the exact same headers and body to your local endpoint. If you use ngrok, you can resend from the ngrok inspector at http://127.0.0.1:4040. If you only have CLI or Dashboard access, you’ll need to wait for the next automatic retry or manually retrigger the event.
Best Practices for Reliable Stripe Webhook Processing
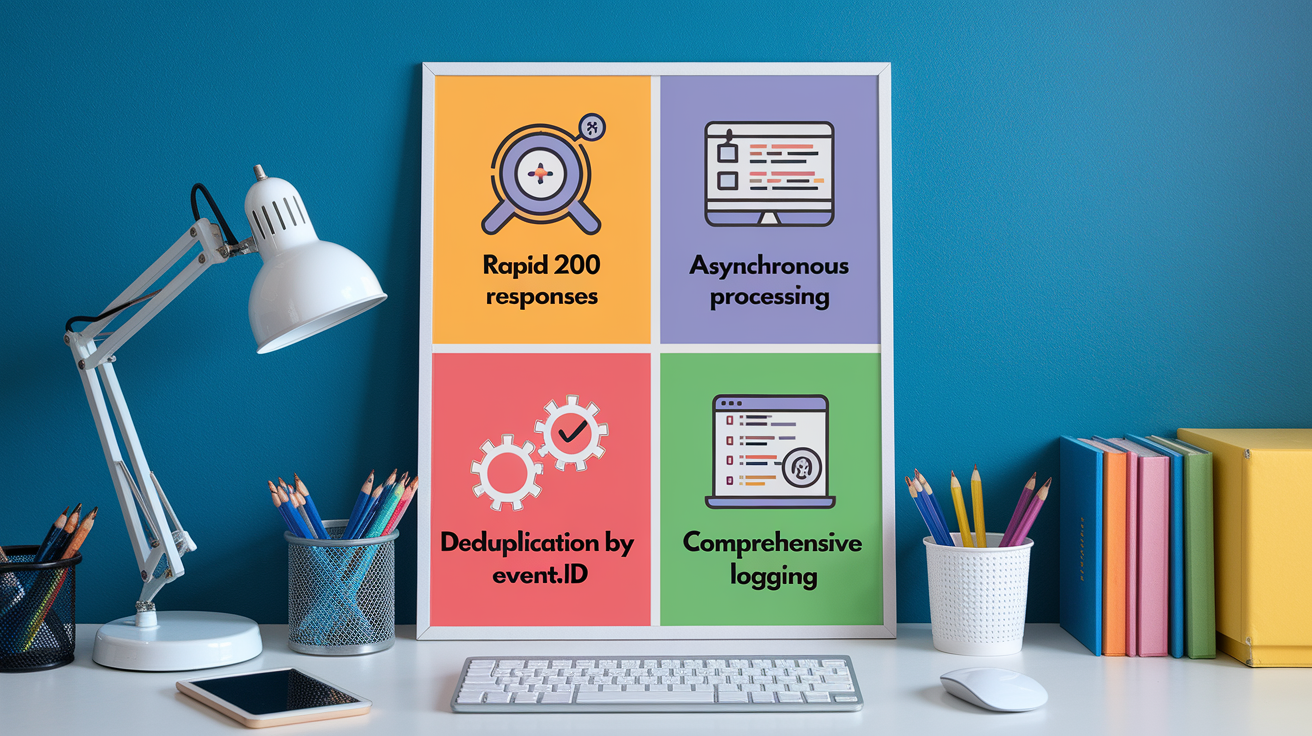
Stripe expects your webhook endpoint to respond with HTTP 200 within five to ten seconds. If your handler needs to query a database, call external APIs, or send emails, return 200 immediately and queue the heavy work asynchronously. This prevents timeouts and retries, which waste Stripe’s delivery budget and create duplicate processing risks.
Follow these four rules to keep your webhook handler robust:
Return 200 fast. Acknowledge receipt within a few hundred milliseconds. Parse the event, validate the signature, store the event ID, and enqueue a job. Don’t wait for downstream calls.
Process asynchronously. Use a job queue (Sidekiq, Celery, Bull, SQS) to handle provisioning, emails, and third party API calls outside the webhook request.
Deduplicate with event.id. Stripe delivers at least once, so the same event may arrive twice. Store event.id in your database with a unique index, and skip processing if the insert fails.
Log everything. Write the full event JSON and your handler’s decisions to logs or structured storage. When something breaks in production, you need to see what Stripe sent and what your code did.
Structure your handler like this: verify signature, parse event.type, insert event.id into a processed events table, enqueue a background job with the event payload, and return 200. The background job does the real work. Creating invoices, sending emails, updating subscription status. It can retry on failure without making Stripe think the webhook failed.
Heavy processing inside the webhook request leads to timeouts, which trigger Stripe retries, which can cause duplicate charges or double emails if you don’t deduplicate by event.id. Queue based handlers let you retry failed jobs independently, monitor job failure rates, and scale processing without blocking webhook delivery.
Automated and CI Based Testing of Stripe Webhooks
Unit tests for webhook handlers should not call Stripe’s API. Instead, load a saved JSON fixture of a real webhook event, construct a valid Stripe-Signature header using your test signing secret, and POST it to your handler. Assert that your handler parses event.type, updates the correct database records, and enqueues the expected background jobs. Mock or stub any external API calls so tests run fast and don’t depend on network conditions.
Integration tests can use real test mode events or fake events with unique IDs. If you disable signature verification in test mode, you can POST a fake payment_intent.succeeded event with a unique event.id like evt_test_12345 directly to your handler. Your replay detection logic (unique index on event.id) still works, and you skip the wait for a real Stripe event. This matters for testing invoice related workflows, because a naive test that waits five seconds for an invoice webhook will fail. Invoices may delay up to one hour after the last successful or timed out webhook.
Here’s how to structure webhook tests in CI:
Store signing secrets in CI environment variables. Use GitHub Actions secrets or equivalent to inject STRIPE_WEBHOOK_SECRET at test time. Rotate these secrets independently from production.
Use a dedicated test Stripe account. Create a second Stripe account with no real payment methods and no live mode enabled. Configure CI to use this account’s test mode keys so local and staging environments don’t interfere with CI runs.
Mock external dependencies. If your webhook handler calls Mailgun, Twilio, or AWS, stub those clients in tests so you can assert the correct data was passed without actually sending emails or SMS.
Test deduplication explicitly. Send the same event twice in a test and assert that your handler processes it once. Insert the event.id into your processed events table on the first call and skip on the second.
When testing failure scenarios, use test card 4000000000000341 to generate charge failures, or manually fail a payment intent in the Stripe Dashboard. Invoice payment failures (invoice.payment_failed) are slow to generate in real workflows, so inject a fake event with a realistic payload and a unique ID for fast tests. Always check that your handler logs the event, deduplicates correctly, and enqueues the right job. Those are the behaviors that prevent production incidents.
Final Words
Run your local server, expose it with Stripe CLI or ngrok, and trigger a few mock or real test events to validate your handler.
You covered endpoint setup, signature verification, tunnels vs capture-and-replay, retry handling, and CI-friendly tests. Pick CLI for quick mocks, ngrok for real test-mode events, and capture-and-replay when you need repeatability.
Use the checklist: stable endpoint, raw body verification, idempotency, and short responses to test stripe webhooks reliably. You’ll catch edge cases faster and ship with more confidence.
FAQ
Q: How to test Stripe webhooks?
A: To test Stripe webhooks, run your local webhook server, expose it with Stripe CLI (stripe listen –forward-to …) or ngrok, register the endpoint in the Dashboard, then trigger events with stripe trigger or Dashboard and inspect payloads.
Q: How to test if a webhook is working?
A: Testing if a webhook is working involves sending a test event (stripe trigger or Dashboard), confirming a 200 response within ~5–10 seconds, verifying the Stripe-Signature, and checking request/response details in your app and Dashboard logs.
Q: How to check Stripe webhook secret?
A: To check the Stripe webhook secret, open Stripe Dashboard → Developers → Webhooks, select the endpoint and click Reveal on the signing secret; or read the secret shown by stripe listen, then update your .env if it changed.
Q: Is Stripe API free for testing?
A: The Stripe API is free for testing in test mode: you can create test objects and use test cards without being charged. Real charges only happen in live mode; tools like Stripe CLI are free to use.