


Think your containers are safe because unit tests passed?
Not even close.
A docker image vulnerability scan inspects packages, libs, and Dockerfile layers to catch known CVEs before they hit production.
This post compares practical tools—Trivy, Clair, Anchore, and others—and shows when to scan: build time, registry push, and pre-deploy hooks.
You’ll get short setup steps, CI integration patterns, and the real tradeoffs for speed, depth, and maintenance.
Read on to stop inherited risks from a single outdated base image from spreading through your fleet.
Understanding the Foundations of a Docker Image Vulnerability Scan
A docker image vulnerability scan inspects packages, libraries, and configurations inside a container image to find known security flaws. Scans usually happen at three points: during the build, right before deployment, and when you push or pull images from a registry. You want to catch vulnerabilities early, before they hit production where someone can exploit them.
Image scanning works by analyzing the layers that make up a Docker image. Each layer represents a Dockerfile step like installing a package, copying files, or setting environment variables. Scanners compare what’s in those layers against CVE databases such as the National Vulnerability Database or vendor feeds. If a package version matches a known vulnerability, the scanner flags it and gives it a severity rating.
The inherited risk problem is why these scans matter. When you build an image FROM a vulnerable base, your final image inherits every vulnerability in that parent. One outdated library in the base can silently compromise dozens of downstream images. Scanning surfaces these hidden risks before they spread across your infrastructure.
Scans typically check:
- Operating system packages installed via apt, yum, or apk.
- Application dependencies like Python pip libraries, RubyGems, or Node.js modules.
- Misconfigurations in Dockerfiles, including unnecessary exposed ports or insecure defaults.
- Kubernetes manifests or IaC templates in multi-stage builds.
- CVE database mapping to correlate package versions with published vulnerabilities.
Comparing Popular Tools Used for Docker Image Vulnerability Scans
Eight scanners dominate the docker image vulnerability scan ecosystem as of February 11, 2025. Each addresses different needs, whether that’s speed, depth, cost, or integration simplicity. Trivy is an open-source all-in-one scanner covering OS packages, application dependencies, IaC templates, and misconfigurations. It’s fast, free, and integrates cleanly with CI/CD pipelines and registries. The main drawback? False positives on large or heavily customized images.
Clair provides layer-by-layer static analysis and plugs into registries like Harbor to automate scans on every push or pull. It’s free, but you’ll maintain its vulnerability databases and configure it yourself. Snyk Container is developer-focused with continuous monitoring of deployed images. It tracks newly disclosed vulnerabilities even after deployment. Free tier is limited. Paid plans start at $45 per developer per month.
Anchore Engine is open-source with deep policy enforcement. You can define custom rules, like blocking images with “latest” tags or flagging specific packages. Configuration can get complex. Some enterprise features live only in the paid edition. Aqua Microscanner is lightweight, designed to run during the build. It provides basic OS-package scans and focuses on image hardening, but full protection requires the broader Aqua platform.
Docker Scout is Docker-native and integrates with Docker Hub, CLI, and Desktop. It offers layer-by-layer vulnerability breakdowns, but it’s most useful if you’re already on Docker Hub. It lacks some advanced features found in other tools. Qualys Container Security is enterprise-grade, covering image scanning in registries, runtime container monitoring, and compliance enforcement. It integrates with Docker Hub, Kubernetes, and CI/CD. The cost can be steep for small teams. Grype is a lightweight open-source scanner backed by a comprehensive vulnerability database. It supports CI/CD and registry integrations but offers fewer customization options than enterprise tools.
Tool categories:
- Open-source, fast, reliable: Trivy, Grype, Clair. Ideal for teams that want full visibility and no licensing fees.
- Developer and CI-focused: Snyk Container, Aqua Microscanner. Built to catch issues early and guide fixes.
- Enterprise and compliance-focused: Anchore Engine (commercial edition), Qualys Container Security. Designed for policy enforcement and audit trails.
- Docker-native: Docker Scout. Best for Docker Hub users who want tight integration.
| Category | Representative Tools | Typical Use Case |
|---|---|---|
| Open-source | Trivy, Grype, Clair | Fast scans, CI/CD integration, full auditability, zero licensing cost |
| Developer-focused | Snyk Container, Aqua Microscanner | Remediation guidance, continuous monitoring, early feedback in development |
| Enterprise | Anchore Engine (paid), Qualys Container Security | Compliance enforcement, custom policies, runtime monitoring, audit support |
Using Trivy for a Docker Image Vulnerability Scan
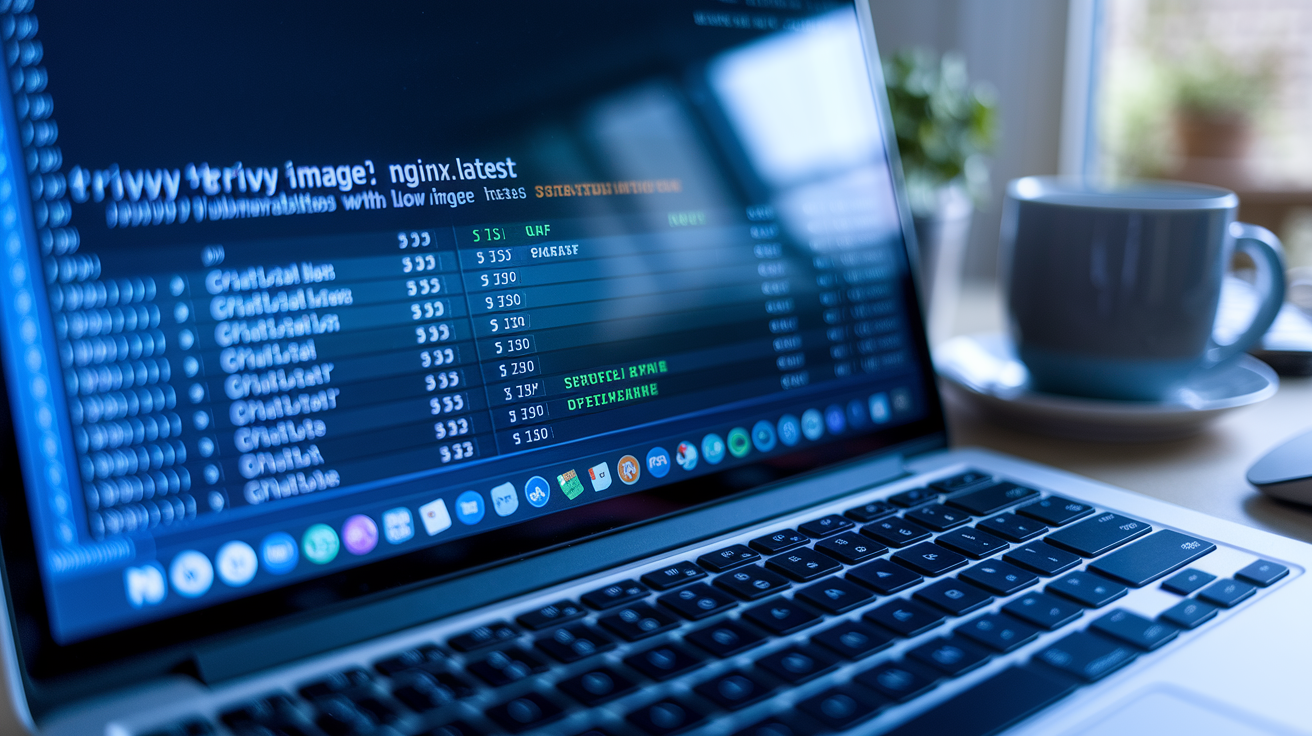
Trivy is one of the simplest ways to start scanning. It detects vulnerabilities in OS packages, application dependencies, IaC templates, and image misconfigurations. Because it’s open-source with no licensing barrier, it fits neatly into developer workflows and CI pipelines. The scanner is known for speed. It can generate false positives on images built with custom package sources or heavily layered FROM instructions.
A basic Trivy scan:
- Install Trivy on your local machine or CI runner using the official release binaries or package manager.
- Run the scan against an image by name, for example
trivy image nginx:latest. Trivy pulls the image (if not already cached) and inspects every layer. - Review the output to see a table of vulnerabilities grouped by severity: CRITICAL, HIGH, MEDIUM, LOW, along with CVE IDs and affected package versions.
- Integrate with CI by adding a Trivy step that exits with a non-zero code if CRITICAL or HIGH vulnerabilities are found, blocking the pipeline before you push the image.
Trivy scans minimal base images like Alpine or Distroless just as easily as full Ubuntu or CentOS images, making it flexible for teams that mix base-image strategies.
Applying Clair for Static Layer-by-Layer Container Image Scanning

Clair performs static analysis by breaking down each layer of a container image and checking the packages added in that layer against multiple CVE databases. It doesn’t run the image or execute code. It simply reads the filesystem changes introduced by each Dockerfile instruction. This layer-by-layer approach makes it easy to trace which instruction introduced a vulnerable package. Clair integrates with registries like Harbor to trigger scans automatically whenever you push or pull an image, turning your registry into an active security checkpoint.
Clair’s key features:
- Multiple vulnerability feeds. Clair pulls from sources like Debian Security Tracker, Ubuntu CVE Tracker, RHEL Oval feeds, and Alpine SecDB.
- Registry-based vulnerability scanning. Scans happen server-side when images enter or leave the registry, so developers don’t need a local scanner.
- Layered reporting. Each layer’s vulnerabilities are reported separately, making it clear whether a vulnerability came from the base image or a later RUN instruction.
- Operational overhead. You’ll deploy and maintain a Clair server, keep its vulnerability databases updated, and sometimes supplement it with runtime security tools for live container monitoring.
Anchore Engine Deep Dive for Docker Image Vulnerability Scanning

Anchore Engine is an open-source scanner built around a modular architecture that separates image analysis, policy evaluation, and enforcement. It’s designed for teams that need more than a simple pass/fail scan. Teams that want to define custom policies, generate software bills of materials, and enforce security gates in CI/CD and Kubernetes clusters. Anchore produces detailed metadata for every image it scans, including the Linux distribution, layer count, image digest, size, and a full inventory of installed packages.
Anchore Architecture Components
Anchore Engine is composed of six services that work together to scan, catalog, and evaluate images:
- API Service. Exposes the REST API that clients and integrations use to submit images, query results, and manage policies.
- Image Analyzer Service. A worker service that pulls images, unpacks layers, inventories packages, and extracts metadata.
- Catalog Service. Maintains the internal database of images, analysis results, policy bundles, and vulnerability matches.
- Queuing Service. Coordinates tasks between the API, analyzers, and policy engine, ensuring scans complete even under heavy load.
- Policy Engine Service. Evaluates scanned images against user-defined policies to produce a pass/fail decision and detailed policy report.
- Kubernetes Webhook Service. Acts as an admission webhook to validate images before Pods are created in a Kubernetes cluster.
Deployment Options
Anchore can be deployed via docker-compose for quick local testing or via Helm for production-grade Kubernetes installations. The docker-compose quickstart involves creating a working directory, pulling down a docker-compose.yaml and a config/config.yaml file, and running docker-compose up -d. Once the services are running, you interact with Anchore using the anchore-cli Docker image, passing credentials and the API endpoint as environment variables or flags.
For Kubernetes, the Helm chart installs all six services as separate pods and creates a secret for the admin password. After installation, you retrieve the password from the secret and spawn an ephemeral anchore-cli pod to run commands inside the cluster. This pattern keeps your Anchore components in the same namespace where you enforce image policies, simplifying network access and secret management.
Integrating Docker Image Vulnerability Scans into CI/CD Pipelines

Embedding scanning images in CI/CD pipelines transforms security from a post-deployment afterthought into a mandatory quality gate. The pattern is simple. Build the image, scan it, and only push it to the registry if it passes policy checks. If the scan finds CRITICAL vulnerabilities or policy violations, the build fails immediately. The developer receives a detailed report showing which packages or Dockerfile instructions introduced the issue. This fail-fast approach prevents vulnerable images from ever reaching production.
Jenkins is a common integration point. The Anchore Jenkins plugin reads a workspace file named anchore_images that lists image names and tags, then invokes the Anchore API to evaluate each image. If the policy check returns a “stop” status, the plugin marks the build as failed. GitHub Actions and GitLab CI follow similar patterns, using dedicated scanner actions or container steps that run Trivy, Grype, or Snyk against the freshly built image.
Registry-based scans add another layer. When you push an image to Harbor with Clair enabled, the registry scans the image asynchronously and marks it as “vulnerable” or “safe” in the UI, giving ops teams a second checkpoint before deployment.
A typical pipeline includes five stages:
- Build the image from the Dockerfile and tag it with a unique version or commit SHA.
- Scan the image using a CLI scanner or API call, generating a vulnerability report and policy evaluation.
- Evaluate the results against severity thresholds. Fail the build on CRITICAL or HIGH, warn on MEDIUM, and log LOW for tracking.
- Annotate the image with scan metadata or upload an SBOM artifact to your artifact store.
- Push the image to the registry only if it passed all checks, ensuring no vulnerable images enter the deployment pipeline.
Registry-Based Docker Image Vulnerability Scanning Workflows

Registry-based vulnerability scanning shifts the scan from the developer’s laptop or CI runner to the registry itself. When you enable scanning in a registry like Harbor, every image pushed to the registry is automatically queued for analysis. The registry runs Clair or another scanner in the background, indexes the image layers, and updates the image metadata with vulnerability counts and severity tags. Pull operations can also trigger scans, so even images imported from external registries are checked before they’re used in production.
Private registries require authentication and sometimes custom configuration. For example, adding a private Docker V2 registry to Anchore looks like this:
anchore-cli registry add index.docker.io username password
Replace index.docker.io with your registry URL, such as registry.example.com:5000. Some vendor registries, like Amazon ECR, require extra parameters to handle IAM roles and region-specific endpoints.
Key workflows:
- Push-triggered scans. The registry scans every new image tag automatically, marking images as “scanned” and storing the results in a database.
- Pull-time policies. Some registries can block pulls of images that haven’t been scanned or that failed policy checks.
- Webhook notifications. When a scan completes or a new vulnerability is discovered, the registry can POST a webhook to your incident management system.
- UI dashboards. Operators can view vulnerability trends, compare image versions, and drill down into specific CVEs without leaving the registry UI.
Kubernetes Admission Controls for Blocking Vulnerable Images

Kubernetes admission webhooks intercept Pod creation requests and validate them against custom policies before the Pod is scheduled. This gives you a last line of defense. Even if a vulnerable image slips through CI/CD, the cluster can refuse to run it. Anchore provides a Kubernetes Webhook Service that acts as a ValidatingWebhookConfiguration target. When a developer tries to create a Pod, the API server sends the image reference to Anchore, which looks up the image’s policy evaluation. If the image failed policy checks, Anchore returns a denial message and the Pod creation is rejected.
How Admission Webhooks Block Images
After you install Anchore’s Helm chart, you create a ValidatingWebhookConfiguration resource that tells the Kubernetes API server to call the Anchore webhook for every Pod, Deployment, or StatefulSet that references a container image. The webhook checks whether the image has been analyzed and whether it passed the active policy. If the image is unknown or flagged as a “stop” result, the webhook denies the request with a message like “Image failed policy check: wordpress:latest.” This enforcement happens in real time, so no manual intervention is required. Vulnerable workloads simply can’t start.
Generating SBOMs for a Docker Image Vulnerability Scan

A Software Bill of Materials lists every package, library, and dependency inside an image, along with version numbers and licensing information. SBOM generation for docker images helps scanners trace vulnerabilities back to specific components and makes it easier to respond to new CVEs. When a zero-day vulnerability is disclosed, you can query your SBOM inventory to find every image that contains the affected package, then prioritize rebuilds and patches.
Tools like Snyk and Anchore export SBOMs in standard formats that other systems can consume. These exports include package names, versions, licenses, and sometimes file hashes. Continuous monitoring tools use SBOMs to alert you when a new CVE affects a package you’re already running, even if the image was scanned weeks ago.
Common SBOM formats:
- CycloneDX. A lightweight JSON or XML schema designed for security use cases, widely supported by vulnerability scanners.
- SPDX. The Software Package Data Exchange format, originally focused on open-source licensing but now extended to include security metadata.
- Proprietary JSON/HTML reports. Some tools output their own SBOM-like reports optimized for their dashboards and remediation workflows.
Prioritizing and Remediating Vulnerabilities After Scanning Docker Images

Not all vulnerabilities deserve the same urgency. A CRITICAL CVE in a public-facing web service is different from a LOW severity issue in a package you never actually use. Scanners use CVSS v3 scoring to assign severity levels, but smart teams layer on additional context. Whether the vulnerable code path is reachable, whether an exploit exists in the wild, and how exposed the container is. This risk-based prioritization keeps teams from drowning in noise and focuses effort on fixes that actually reduce attack surface.
Remediation starts with understanding what introduced the vulnerability. Scanners that map vulnerabilities to Dockerfile instructions make this easy. If a vulnerability appears in a base image, the fix is to switch to a newer base or a different distribution. If it’s in an application dependency, you upgrade the package version in your package manifest and rebuild. Some tools go further and recommend exact remediation steps, like “Upgrade openssl from 1.1.1d to 1.1.1k” or “Switch your base image from ubuntu:18.04 to ubuntu:22.04.”
Five common remediation actions:
- Upgrade the base image to a newer version that includes patched packages.
- Patch individual packages by running
apt-get upgradeorapk upgradein your Dockerfile, then clearing caches to keep the image small. - Swap dependencies for alternatives. If a Python library has unpatched vulnerabilities, find a maintained fork or a different library.
- Remove unnecessary packages to shrink the attack surface. If you don’t need curl or wget in production, delete them.
- Use distroless or minimal base images like Google Distroless or Alpine to start with fewer installed packages and fewer potential vulnerabilities.
Image Hardening Practices to Reduce Vulnerabilities Before Scanning
Preventing vulnerabilities is faster and cheaper than fixing them. Image hardening best practices reduce the number of packages, privileges, and configuration risks in your images before you ever run a scan. Multi-stage builds are powerful. You compile or build your application in one stage with all the dev tools installed, then copy only the final binary into a minimal runtime stage. The runtime stage has no compilers, no build tools, and far fewer packages, so there are fewer things to scan and fewer vulnerabilities to fix.
Key hardening steps:
- Pin base image versions using a digest or explicit tag like
ubuntu:22.04instead ofubuntu:latest, so you control exactly which base you build on. - Run as a non-root user by adding a
USERinstruction in your Dockerfile, limiting what an attacker can do if they compromise the container. - Remove package manager caches with
rm -rf /var/cache/apk/*orapt-get cleanafter installs to shrink image size and eliminate stale metadata. - Use
.dockerignoreto keep secrets, logs, and unnecessary files out of the build context. - Minimize installed tools by choosing images like Alpine or Distroless that ship with only the essentials, cutting your vulnerability count by 50% or more compared to full OS images.
Continuous Monitoring and Lifecycle Management of Docker Image Vulnerabilities
A one-time scan is a snapshot. Continuous monitoring of image vulnerabilities watches your deployed images over time and alerts you when new CVEs are published that affect packages you’re already running. This is critical because vulnerability databases are updated daily. An image that passed all checks last week might be flagged today because a researcher disclosed a new exploit.
Snyk Container and Qualys Container Security both support continuous monitoring. After you deploy an image, these platforms track it and cross-reference its package inventory against updated CVE feeds. When a new vulnerability appears, you receive an alert with details about which images are affected, the severity, and recommended fixes. Clair and Anchore rely on periodic re-scans and updated vulnerability databases. You can automate re-evaluation by scheduling a cron job or CI pipeline that re-submits your running images to the scanner every day or week, ensuring you catch newly disclosed issues even in long-lived containers.
Final Words
Run scans during builds, on push, and in CI to catch OS packages, dependency CVEs, and misconfigs before they hit production.
Pick a tool that matches your workflow: Trivy for fast checks, Clair for layer-by-layer analysis, Anchore for policy and SBOMs. Integrate scans into registries and pipelines so failures block bad images early.
Prioritize fixes by severity, slim images with multi-stage builds, and use admission webhooks to stop risky deployments.
Making docker image vulnerability scan part of your pipeline keeps risk low and deployments predictable.
FAQ
Q: What is a Docker image vulnerability scan?
A: A Docker image vulnerability scan inspects image layers, OS packages, and application dependencies against CVE databases to find vulnerabilities and misconfigurations before deployment.
Q: When should I run Docker image vulnerability scans?
A: You should run Docker image vulnerability scans during the build, on push/pull to registries, and before deployment to catch inherited base-image issues and fail CI early.
Q: Which tools are commonly used for scanning container images?
A: Common scanners include Trivy, Clair, Snyk Container, Anchore, Aqua Microscanner, Docker Scout, Qualys, and Grype, covering quick local scans through enterprise monitoring.
Q: How do you use Trivy to scan a Docker image?
A: Using Trivy to scan an image, run trivy image
Q: What makes Clair different from other image scanners?
A: Clair analyzes each image layer statically, maps package data to CVEs, integrates with registries like Harbor for push/pull scans, and requires DB maintenance and operational setup.
Q: What are Anchore Engine’s core components?
A: Anchore Engine’s core components are API service, Analyzer, Catalog, Queue, Policy Engine, and Kubernetes Webhook, producing SBOMs, metadata, and policy-based image checks.
Q: How do I integrate image vulnerability scans into CI/CD?
A: Integrating scans into CI/CD means running image scans in pipeline stages, failing builds on vulnerability thresholds, storing artifacts, and using registry or plugin integrations for automated monitoring.
Q: How do registry-based image scans work?
A: Registry-based image scans run on image push/pull, authenticate to private registries, invoke scanners like Clair or Anchore, and attach reports or block images based on policies.
Q: How do admission controllers block vulnerable images in Kubernetes?
A: Admission controllers block vulnerable images by validating scan results at deploy time via webhooks or OPA Gatekeeper policies, rejecting pods that exceed defined vulnerability thresholds.
Q: What is an SBOM and why generate one for images?
A: An SBOM (software bill of materials) lists image packages and dependencies so scanners trace vulnerabilities; generate SBOMs (SPDX, CycloneDX, JSON) for audits and continuous monitoring.
Q: How should I prioritize and remediate vulnerabilities found in images?
A: Prioritize by CVSS, exploitability, and image usage; remediate by upgrading base images, patching packages, swapping dependencies, shrinking images, or adding compensating controls.
Q: How can I harden Docker images before scanning?
A: Harden images by pinning explicit base versions, using minimal base images, running as non-root, removing unnecessary packages, and using multi-stage builds to reduce the attack surface.
Q: Why is continuous monitoring of image vulnerabilities important?
A: Continuous monitoring re-scans images as CVE databases update, detects new exposures in deployed images, and triggers alerts or redeploy workflows to keep runtime risk low.